How to annotate screenshots on Mac
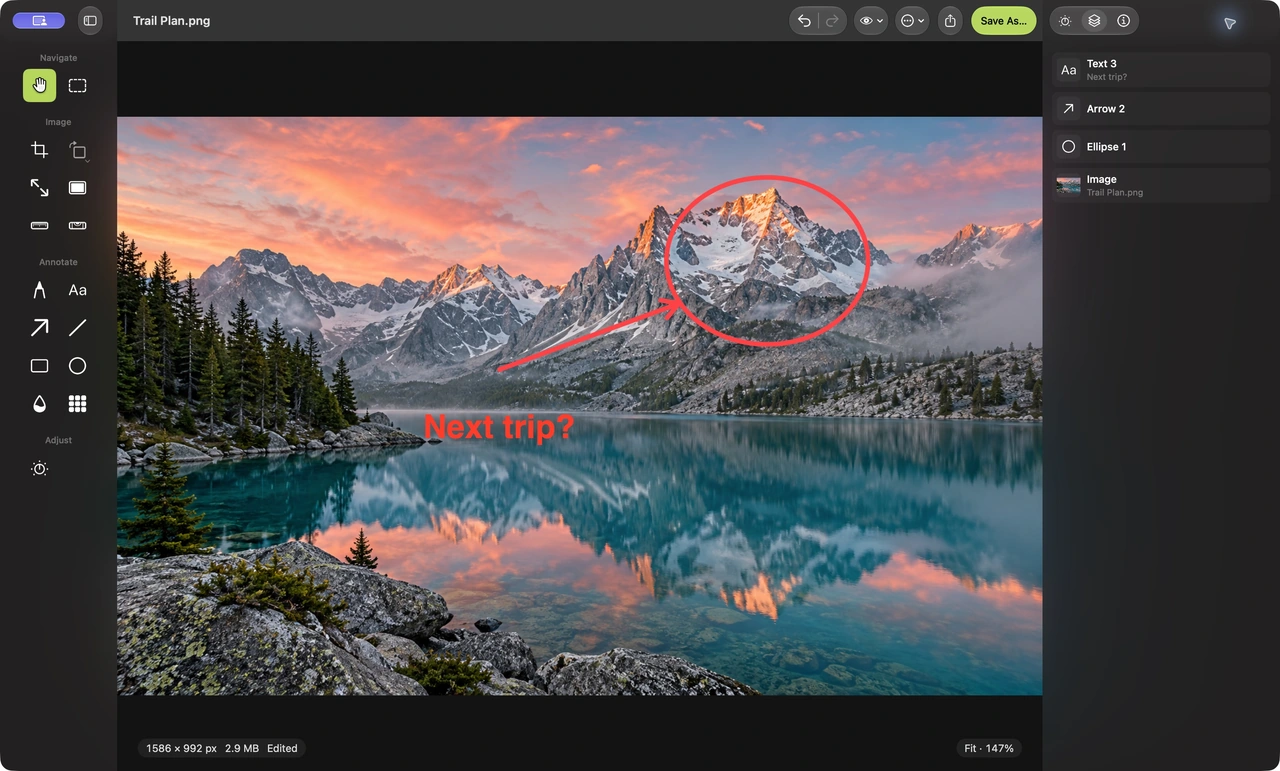
To annotate a screenshot on Mac, open the screenshot in Montane and add arrows, shapes, or short text labels from the Annotate tools. Move and refine the objects while the image is open, then save a copy and review it before sharing.
This guide uses Montane, a free Mac image editor on macOS 14 or later. The goal is to make a screenshot easier to understand: what should the reader notice, and what should they do next?

Decide what deserves a callout
A useful annotation answers a specific question. An arrow can identify a button. A rectangle can mark a layout problem. A short label can explain the expected change. Covering the image with marks makes the reader work harder, so start with the smallest set that communicates the point.
Keep enough context for orientation. If you are reporting an issue, the relevant window title or surrounding controls may help someone reproduce it. Remove unrelated empty space using the crop guide, but avoid cutting away the context that makes the screenshot useful.
Before marking anything, check the screenshot for information you should not share. The safest starting point for a public tutorial is a demo screen without personal data. Montane’s blur and pixelation tools are visual effects, not a guarantee of secure redaction.
Add screenshot annotations in Montane
- Open the screenshot. Choose File → Open and select the saved image. PNG is a useful starting format for screenshots with small interface text.
- Set the framing. Crop away irrelevant edges if needed. Keep important labels and enough surrounding interface to explain where the callout belongs.
- Add an arrow. Select Arrow in the tool rail and drag on the image. Point its end at the relevant detail, leaving the detail itself visible.
- Add a shape where it helps. Use Rectangle or Ellipse to surround a region. Use the contextual controls to choose a clear color and stroke width.
- Add a short label. Select Text, click the image, and type a concise instruction or explanation. The text guide covers font, size, color, and multiline labels.
- Refine the objects. Select a placed object to move or resize it. Use the editable objects inspector to select overlapping objects and adjust their order when needed.
- Save and inspect. Use Save As to export a copy, then reopen it. Check that labels remain readable and arrows still point to the right place at the intended display size.
Make labels easy to follow
Use a short phrase with a clear action or observation: “Move this button,” “Check the spacing,” or “Open this menu.” If the explanation needs a paragraph, put that paragraph in the message or document accompanying the screenshot. The image should help the reader locate the point.
Choose a color that separates the mark from the interface underneath. A bright annotation against a dark screenshot can work well, but brightness alone does not guarantee readable text. Check the label against the particular area it crosses, especially when that area contains several colors.
Keep stroke widths and label styles consistent. A single obvious callout color usually creates a cleaner result than several unrelated colors. If several steps need to be explained, use a small sequence of clear labels rather than an unstructured collection of arrows.
Fine-tune placement without starting again
Montane keeps annotations as editable objects in the open image. You can reposition them, resize shapes, adjust arrow endpoints, and change object order. Arrow keys nudge a selected object by one pixel; Shift–arrow nudges by ten. Use Command–Z if an adjustment makes the layout worse.
These controls are useful for precise feedback. An arrow that stops beside a button is usually easier to read than one that covers its label. A rectangle with space around the problem area keeps the original content visible.
When you save to a standard image format and reopen the file, the annotations are part of the flattened pixels. The exported image does not retain the open session’s separate objects. Finish the layout before closing the editing session, and keep the unannotated source for future revisions.
Common questions
Which format should I use for an annotated screenshot?
PNG is a useful choice when small text and sharp interface edges matter. If a publishing workflow accepts WebP, compare the result carefully using the WebP export guide. JPEG compression can introduce artifacts around text.
Can I blur confidential text before sharing?
Montane offers blur and pixelation, but neither should be treated as secure redaction. Use a source without the sensitive information, remove the affected region where possible, or use a purpose-built verified redaction workflow when secure removal is required.
Why does the label look too small in a message?
The receiving app may display the screenshot at a smaller size. Review it at that size before sending. A tighter relevant crop can help, but shrinking the file’s pixel dimensions too far can also harm readability.
Learn more about Montane’s editing tools or browse all guides.